(SOLVED) Print Jobs Getting Stuck In Queue Windows 10

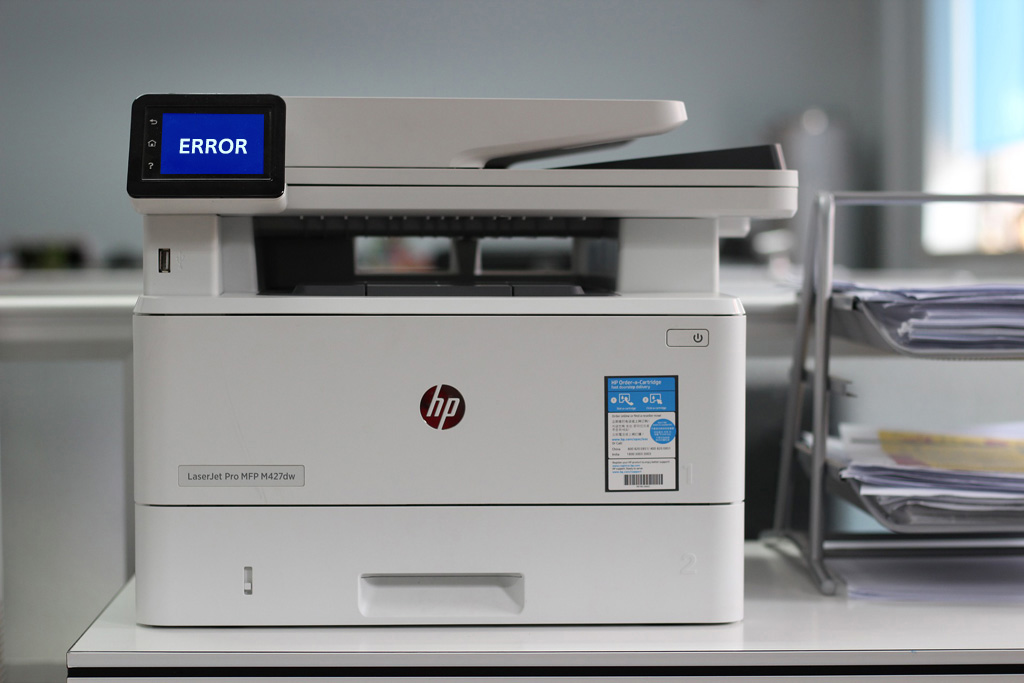
The most annoying issue faced by the users is print jobs getting stuck in a queue on Windows 10 devices. When you have lined up documents to print in the queue, they might get stuck due to the rush. Print jobs getting stuck in a queue in Windows 10 is a very common issue. In this blog, we will learn how to resolve this issue and clean the print jobs from the queue. 

The most convenient way to remove the print jobs from the queue is by right-clicking on the print job and then clicking on the cancel job. Afterward, reboot your system and check whether the print queue has been cleaned or not. Sometimes, the conventional methods won’t remove the print jobs from the queue and you have to move to other methods.

Easy Steps To Remove A Stuck Print Job Using The Command Prompt – 

The fastest way to stop and start the print spooler is by using the command prompt. Follow the steps below to get rid of this issue in no time;

  1. First of all, right-click on the start icon.
  2. Now, press the search button.
  3. Now, in the search box enter ‘command prompt’.
  4. The next step is to right-click on the command prompt.
  5. Here, click on run as administrator.
  6. Then type net stop spooler and press the enter button on your keyboard.
  7. From your device’s start menu, taskbar, or desktop open the file explorer.
  8. In the file explorer window, tap on the web address bar.
  9. Here you must type, C:\Windows\system32\Spool\Printers and now shoot the enter key on your keyboard.
  10. Now you must select and drag the files to highlight them.
  11. The next step is to right-click on the chosen files and click on the delete option to proceed.
  12. You may go back to the Command prompt to reboot the print spooler menu.
  13. Now, type net start spooler and press the enter button on your keyboard.

Easy Steps To Remove A Stuck Print Job Using The Command Prompt – 

You can stop and restart the print spooler from the Services window by following the underlying steps properly and carefully;

  1. Start by right-clicking on the Start button.
  2. Now, tap on the run option.
  3. In the run dialog box enter services.msc and shoot the enter button on your keyboard.
  4. Right-click on the print spooler, find it by scrolling down.
  5. Now, tap on the stop button.
  6. You must leave the services window open. After the print spooler service has stopped you need to navigate to the printer’s directory and get rid of the files that are present within. 
  7. This will remove the print jobs stuck in the queue in Windows 10 devices.
  8. Now follow the same steps as mentioned above and you will be sorted.

Wrapping Up the Print Jobs Stuck In Queue Issue!

After going through the above blog, you know how to remove print jobs getting stuck in the queue Windows 10 issue. You don’t need to hover over other websites for a solution to this problem. We have stated both the methods of resolving the error with easy and descriptive steps. No more frustration, only happy printing!

Why Is There A Need For Canon Selphy CP1300 Troubleshooting?

Everything feels good when it is compact and portable. Just like the Canon Selphy CP1300 printer. It is a wifi-compatible printer that allows you to print from anywhere and from any device. But everything comes to a halt when you face problems with your Canon Selphy CP1300. Nothing can be or work perfectly in this world and so even gadgets are prone to technical defaults and errors. So when you come across problems you need to perform the Canon Selphy CP1300 troubleshooting guide to get rid of the issues. This blog will throw some light on the issues faced by the printer and Canon Selphy CP1300 troubleshooting guide to get rid of the issues.

Problems And troubleshooting Tips For Canon Selphy CP1300 printer – 

  1. Unable to print on Canon Selphy CP1300 printer: 
  • Firstly, you need to be sure that the power cable is properly connected at both ends; the printer and the power supply socket.
  • Now, look if the paper and ink cassettes are securely installed.
  • After that switch on the printer after enabling the power supply and then print a sample page.
  • In case you encounter the error again, you have to replace or refill the ink cassette as per the requirement.
  • You must always keep in mind to use the specified paper size and dimensions while the canon Selphy CP1300 printer setup is ongoing.
  • Now link your Canon Selphy CP1300 printer to your PC device.
  • Now again print a test page to resolve the error.
  1. When Canon Selphy CP1300 is unable to print using a camera:
  • First, make sure whether your camera supports PictBridge.
  • While you print via USB wire, make sure the canon Selphy CP1300 printer is linked to the camera directly.
  • Then, check whether your camera is sufficiently charged or not.
  • In case the batteries are depleted, consider replacing them with a set of fully charged batteries.
  • Eliminate any USB or memory chips that are associated with the Canon Selphy CP1300 printer. Next, print from your camera.
  1. Bad quality print from Canon Selphy CP1300 printer:
  • If you use printing material such as paper and ink that is free from any sort of dust and dirt then you can print in good quality.
  • Switch off the Canon Selphy CP1300 printer before cleaning the printer’s inner parts.
  • Make sure you utilize a lint-free cloth for cleaning the printer.
  • Make sure you don’t put in too much pressure while cleaning the interior of the Canon Selphy CP1300 printer.
  • Make sure you keep the Canon Selphy CP1300 aways from the electromagnetic waves producing devices to avoid any obstruction.
  • Make sure you insert only a sufficient amount of papers and don’t overload the input tray.
  • The power wire must be well connected to both terminals. 

Canon Selphy CP1300 Troubleshooting Discussed!

That was all about the Canon Selphy CP1300 troubleshooting guide. Follow the steps very accurately to rule out any error you face while using the Canon Selphy CP1300 printer. A Canon printer allows you to print wirelessly from any device which makes it a convenient option for people who are always on the go. Enjoy Canon-ing!

How Is Canon Pixma MG3122 Wireless Printer Setup Without CD Done?

You must have got your hands on a Canon PIXMA MG3122 multi-faceted printer if you are here. Canon printers offer the best photo print quality. As you know, to use any printer, you first have to go through its setup process. The setup can be carried out via two ways, installation via CD and installation via Canon printer’s official portal. In most cases it is advised to install the Canon printer by going to the official handle. This blog will explain to you about the Canon PIXMA MG3122 wireless printer setup without a CD. Mostly, it is recommended to install the printer via the official portal of the canon printer as it contains the latest and updated version of the Canon printer. 

Follow The Steps To Install Canon PIXMA MG3122 Setup Without CD:

If you want to install the canon PIXMA MG3122 printer without the installation CD, on your Windows and macOS device then follow the steps mentioned below; 

  • The first step is to go to the Canon printer’s official portal  to download and install the printer driver software.
  • On the welcome screen fill in your canon printer’s model name and  number to look for the most compatible printer drivers. 
  • In the next step, fill in the operating system on which you are obtaining the printer drivers to download the suitable printer drivers.
  • After the download of canon printer drivers is finished, go to the downloads folder in your computer and then click on the driver file. 
  • Next, save the file to  the default location on your system and hit the next button to proceed. After that wait patiently for at least one minute.
  • Time being, the installer extracts the data so that the installation can initiate,
  • Now, look for the folder where canon driver files are saved. Here, double-click on the driver file to apply it. 
  • You have to now follow the installation instructions on the install wizard that reflects on your device’s screen. This way you can complete the setup of your computer.
  • The next step involves restarting your computer or laptop and then your installation procedure will be completed.
  • Now, check the printer’s functioning by printing a test page. 

Follow The Steps To Perform Canon PIXMA MG3122 Wireless Setup:

  • Initiate the wireless setup by turning on your Canon PIXMA MG3122 printer after plugging it into the power supply socket.
  • The power LED light when turned green indicates the power is enabled.
  • Now, push the setu[p tab on your Canon PIXMA MG3122 printer.
  • Now, make use of the right and left arrow buttons on your printer to select the WLAN setup. Afterward press the OK button.
  • The wireless connection will be turned on if the blue wifi lamp is lit. 
  • Now, let the canon printer process all the access points nearby. 
  • Now, choose a preferred method to connect after looking at the display screen.
  • If the push button method pops up on your screen, then hit the stop tab, if you don’t know anything about the access points.
  • Wait before initiating the wireless setup. Your network might disappear when the printer installation is completed.
  • Finally your wireless setup can be completed. Now commence printing the tasks. 

Canon PIXMA MG3122 Printer Installation Without CD Done N Dusted!

That’s it! Your Canon PIXMA MG3122 wireless setup without CD is completed. This process ensures that you have the most recent printer drivers version, which is not certain in installation via CD.

Decode The Way To Reinstall Print Spooler Service In Windows 10

Imagine a state where your computer system displays a message, ‘Print spooler is stopping’ or ‘print spooler is not running. These messages appear on a Windows 10 device very often. If you are lucky enough to not receive such a message then save this blog for the future. But, if you are also facing such an issue, then you need to follow this guide where we will discuss some fantastic ways to troubleshoot the printer spooler problems like deleting the printer spooler documents or files, reinstall the print spooler service in Windows 10, get rid of unwanted printers added to your system. Now, follow the blog closely to get rid of print spooler errors.

Various Tips To Troubleshoot Print Spooler Issues On Windows 10 System: 

  1. Try eliminating the print spooler data. If the printer is crowded with files or documents in the print spooler then it will cease proper functioning. It is a must to remove and abolish excess or corrupt data to solve this issue.
  2. You can try loading the Print spooler data. To reboot the print spooler data firstly, press+hold the Windows and R keys on your keyboard. This will launch a run dialogue box, here enter services.msc and press the enter key. You will notice the print spooler service. Now, right-click on it to proceed. Now, restart it and check whether you are facing this issue or not.
  3. Now, you can try uninstalling and reinstalling the printer drivers on your computer or laptop. Printer drivers are a very integral part of the printer’s functioning. So without printer drivers, the printer spooler service might act strange. Go and install the latest, updated, and compatible version of the printer drivers software. For that, press the Windows and X keys on the keypad together. Now, open the device manager by clicking on it. Next, tap on the printer drivers option to open it. Right-click on the printer drivers to uninstall them from the system. Now, launch the desired web browser and download the latest compatible printer drivers from there. Make sure the driver file is compatible with your operating system as well. 
  4. The next step is to install the updated Windows 10 version. Check for the updates of your Windows 10 regularly. To do that, fill in ‘windows updates’ on your system and then press the enter key. Now, press the windows updates and choose the latest version.
  5. It is very important to protect your computer system from malware and viruses. For that, you must install antivirus and malware on your device. It can spoil the stats of your device. The virus can affect the working of the printer spooler service on your Windows 0 device. Procure a reliable and efficient antivirus on your system so that it can protect the device from being at risk by viruses and malware. 

Print Spooler On Windows 10 Problem Is A Past Now!

It is so relieving to finally be able to print once the print spooler issue has been ruled out. The troubleshooting tips mentioned above are quite useful but out of all, if you reinstall print spooler service on windows 10 you can easily resolve any glitches that arrive due to the print spooler service.

Is Your Printer Status Unavailable? How To Fix It?

Is your printer showing a ‘Printer Status Unavailable’ error? When you encounter this issue on your printer while trying to print a document or photo, usually the cause of it is corrupt printer drivers or software. A printer functions solely due to the printer drivers on your system. Check the printer drivers on your system, make sure they are not outdated or corrupt. The printer drivers software must be compatible with your printer model and the operating system otherwise it won’t function. In this article, we will tell you how to resolve the ‘Printer Status Unavailable’ issue.

Stepwise Instructions To Resolve Printer Status Unavailable Issue On Windows 10 Device:

  • To initiate the process, turn off your printer and then turn it on again. This will get rid of technical faults if any. 
  • Reboot your computer system as well and then take out a printout to check the printer.
  • Ensure that you have logged in with the same administrative account while printing the documents or photos.

Stepwise Instructions To Uninstall And Reinstall The Printer Drivers:

The uninstallation and reinstallation of printer drivers is a prime step in resolving the ‘printer status unavailable’ error. Follow the stepwise instructions below to know how to uninstall and reinstall the printer drivers;

  • First of all, press the windows and R buttons together. 
  • This will open a search field on your screen.
  • Here, type ‘control printers’ and press the enter button to proceed.
  • Now, launch the ‘devices and printers’ menu next.
  • You will see a list of printers on your screen. Right-click on the printer that is facing the unavailable status issue.
  • Now, choose the remove option to remove the printer from your computer or laptop.
  • Click on yes to confirm the deletion of the printer from the system.
  • Now, press the windows and R buttons together once again.
  • Type devmgmt.msc in it and then tap on the enter key to proceed.
  • Now, a device manager utility will be opened on your screen.
  • Find the print queues tab from the device manager window and press the enter key. You will observe a drop-down list, from there choose a printer you wish to use.
  • Now, click on uninstall to uninstall that device once you right-click on the printer.
  • Now, press the windows and R button once again. This will launch the run dialog box. Enter ‘appwiz.cpl’ here and then hit the enter button.
  • A program and feature Window will reflect on your computer screen.
  • After that, shut down the computer or laptop and disconnect it from the printer. Wait there for a few moments.
  • Press the windows and R key on the keypad to update the printer drivers.
  • In the run dialogue box, enter ‘devmgmt.msc’ and the device manager will be launched.
  • Now, expand the print queues option when you spot it. 
  • From the drop-down list, select the printer you are recently using. Right-click on the updated driver option to choose it.
  • To search the updated printer driver file, tap on the choice ‘Search automatically for updated driver software and then it will update the latest version of the driver software automatically. program and feature will Window will reflect on your computer or laptop screen.
  • After that switch off your PC devicd

No More Printer Status Unavailable Issues!

Now you won’t face the ‘printer status unavailable error anymore. Printer drivers are a very crucial part of your printer’s functioning. So you must always keep a check on the latest printer driver upgrade. Make sure you download the printer drivers that are compatible with the printer you are using and the operating system on which you are downloading it.

Make Brother TN630 Wifi Setup Easy

Out of so many launches of Brother printers, TN630 is considered to be the best launch. It is a wireless printer which makes it easier to print from anywhere in the house. The wireless printing is a user-friendly feature that you can enjoy only if you do the Brother TN630 wifi setup. In this article, we will discuss how to do the Brother TN630 wifi setup easily and quickly. 

Before proceeding with the Brother TN630 wifi setup keep in mind to get the printer drivers on your system. Make sure you download the Brother printer drivers that are compatible with your printer model and your operating system. Also, ensure that the printer drivers software is of the latest version. You must also make sure that the wifi network is stable and active so that there is no obstruction while the setup process is ongoing. 

Prerequisites Of The Brother TN630 Wifi Setup – 

Make sure you have noted down the following things before going for the setup as you might need these during the setup;

  • Name of the Wifi network i.e. SSID
  • The password of the wifi network

Stepwise instructions To Do The Brother TNJ630 Wifi Setup Easily – 

Once you have taken care of all the points mentioned above, now you must proceed with the setup. For that, follow the steps listed below carefully; 

Step 1: The first and foremost step is to attach the power wire to the Brother TN630 printer and then plug it into the electrical wall socket.

Step 2: Now, press the power button to turn on the printer.

Step 3: Press the up and down arrow buttons to select the network option and after that press the ok button. 

Step 4: Now, look for the WLAN option by again using the up and down arrow buttons.

Step 5: To choose the Setup Wizard click on the up and down key and then tap on the OK button.

Step 6: If you observe a prompt on your screen asking, ‘Enable WLAN option?’ for that, press the OK button and enable the wifi. Now, the wireless network wizard will initiate.

Step 7: Now, your Brother TN630 will start scanning the wifi networks nearby and display the available networks on the screen. From there choose the network name of your wifi router. 

Step 8: Now, to complete the setup, download the printer drivers and software.

Step 9: Navigate to the official website of Brother printer. 

Step 10: Here, enter the printer model you are using and then enter the operating system of the device on which you are downloading the drivers. 

Step 11: Then, click on the download tab.

Step 12: After that, navigate to the Downloads folder and click on the download .exe file to run it. Once you run the file the drivers’ installation will begin.

Step 13: Finally,  follow the on-screen guidelines to complete the installation and start using the Brother TN630 wireless printer. 

Brother TN630 Wifi Setup Complete And Printer Ready To Use!Brother TN630 wifi setup

is now complete. You can enjoy wireless printing from anywhere in your home. Make sure you follow all the above-mentioned steps properly and carefully. Also, keep in mind to check the version of the printer driver you are downloading. If you come across some error while doing the Brother Tn630 wifi setup then get in touch with our technical team to get your issue resolved and complete the wifi setup.

Easy Methods To Get HP Printer Drivers For Windows 10

Printer drivers are the reason your printer is able to take commands from the computer or laptop. The printer driver software is a mandate for the smooth functioning of your HP printer or any other printer. If the printer driver software is corrupt or missing from the system then the printer won’t accept any commands and won’t work. Always remember to procure the printer driver software that is compatible with your HP printer model and operating system. In this case, we will teach you how to get HP printer drivers for Windows 10. There are two methods in which you can perform the HP printer drivers for Windows 10 download;

  • Wired method using a USB cord.
  • Wireless method using the WPS button.

Stepwise Instructions To Use Wired Method To Download HP Printer Drivers On Windows 10 – 

To download the printer drivers using the wired method, make sure you use the USB wire that comes along with the HP printer. If there is none, then get a new one separately, Always make sure that the USB cable is not damaged and is in working condition;

  1. Start by unboxing the HP printer and lay all the components on a clean and flat surface.
  2. Using the USB wire to link your HP printer to your PC device.
  3. The filler-connected printer driver software will start automatically.
  4. To complete the printer driver download and installation on your Windows 10 device, follow the on-screen instructions carefully.
  5. Then, print a test page to check the print quality once the printer driver installation is complete.
  6. Now, the basic HP printer drivers software has been installed on your device.
  7. Launch the web browser you prefer and visit www.hp.com/support.
  8. After this step, enter the HP printer’s model name and number and Windows 10 in their respective fields.
  9. Then, proceed to download the compatible software.
  10. From your PC device visit the downloads folder and then locate the printer driver file and then click on it to run it. 
  11. A license agreement will appear on the screen, read it and then accept it.
  12. Now follow the on-screen instructions to install the driver software on the PC device.
  13. To check the printer’s functioning, print a test page, and you are done.

Stepwise Instructions To Use Wireless Method To Download HP Printer Drivers On Windows 10 –  

To download the printer drivers using the wireless method i.e. WPS push button method, it is necessary for the printer and wireless router to have the WPS button. In case, any one of the devices doesn’t have the WPS push button, then you can not perform the WPS method to download and install the printer drivers. 

  1. Firstly, insert the printer driver Cd in the CD drive of your Windows 10 system.
  2. Choose the filler version and then hit the next tab. This will start the installation procedure.
  3. Now, follow the on-screen guidelines to install the wireless printer setup. 
  4. When you observe the WPS option, click on the WPS button on the wifi router and then press the Ok button on your HP printer within the next 2 minutes.
  5. Once you notice the ‘link successful’ option. Hit the OK tab to proceed to the next step.
  6. After that, your toenails will be installed on your PC device. Verify the text print after that.
  7. You may visit the official website of HP printer to download the printer driver in case there is some problem with the installation CD.

HP Printer Drivers Downloaded And Installed Successfully!

So now you have an idea how to download and install the HP printer drivers for Windows 10.Wasn’t that easy-peasy and quick? Well, now you can enjoy printing from your HP printer on your Windows 10 device. Have a great printing experience with one of the best printers out there.

Why Is There A Need To Reinstall Print Spooler Service In Windows 10?

You need to reinstall print spooler service in windows 10 if you are facing issues while printing because of the print spooler. In case you are performing your printing jobs on a Windows 10 device and it keeps displaying the error message, ‘Print spooler is stopping’ or ‘print spooler is not running’ then, you need to take certain steps to resolve this issue such as, delete printer spooler files, uninstall unnecessary printers, or reinstall print spooler service in windows 10, etc. In this blog, we will try to cover some basic troubleshooting fixes to resolve the errors with the print spooler service. 

Common Ways To Troubleshoot Print Spooler Issues On Windows 10: 

  1. Remove or delete the print spooler data –

Sometimes due to a crowd of files and documents in the print spooler, it stops functioning properly. You need to delete the excess or corrupt data to resolve the issue.

  1. Reboot the print spooler service – 

It is very easy to reboot the print spooler service by using the following steps; 

  • Hit the Windows and R button together and type services.msc in the dialog box.
  • Spot the print spooler service and then right-click on it.
  • Then select the restart option. Now check whether this solved the issue or not.
  1. Uninstall and reinstall the printer driver software – 

If the printer driver software is not updated then the print spooler might react. For that you must uninstall the printer drivers and then reinstall a latest and compatible version of them.

  • Firstly, press the windows and X button on your keyboard. 
  • Then tap on the Device manager.
  • Now, extend the printer drivers option.
  • Next, right-click on it and then uninstall the printer drivers.
  • Then, open the preferred web browser and download the latest version of printer drivers compatible with your printer and windows 10 device.
  1. Install the Windows 10 updates – 

It is very important to update the windows and check for updates regularly. Check for the updates by following the steps;

  • In the search field enter windows updates and then hit the enter button.
  • Tap on the windows updates and then get the latest and recent windows update.
  1. Run the Anti Malware On your PC device – 

A malware or virus can put your computer and the data on it in trouble. It ruins the stats of the device. If there is malware or virus in the device then this might hinder or obstruct the print spooler service on the windows 10. To remove the malware or virus from your device, download a reliable antivirus or antimalware and run it on your computer or laptop to scan any faults. And then get rid of it.

Print Spooler On Windows 10 Issue Solved!

Once you reinstall print spooler service on windows 10 you can easily resolve any errors that arrive due to print spooler service. In today’s time when almost every task needs a printer to be completed, you cannot afford any printing errors. It is really frustrating when the printer stops functioning. To reinstall print spooler service on Windows 10 is the best solution for your problem.

Brother TN630 Wifi Setup Explained In Easy Steps

Brother TN630 is an efficient and cost-effective printer. With Brother TN630 you can print 1200 pages on one cartridge. It is a wireless printer that allows you to connect to other devices and routers wirelessly. The Brother TN630 wifi setup is very easy and quick to perform. In this blog, we will share the steps to do Brother TN630 wifi setup effectively and enjoy printing wirelessly.

Steps To Follow For Brother TN630 Wifi Setup – 

Before moving ahead with the wireless setup, make sure you have noted down the wireless network’s name and its password to connect to the wifi router. Then, follow the steps stated below to complete the Brother TN630 wifi setup; 

  • Firstly, connect the power wire to the brother printer and then connect it to the power supply socket.
  • After that, switch on the printer by pressing the power button.
  • Use the up and down arrow keys to scroll through the network options and then tap on the ok button.
  • Use the up and down keys again to look for the WLAN option and then tap on the OK button.
  • Select the Setup wizard option by pressing the up and down key and again tap on the OK button.
  • If you see a prompt, ‘Enable WLAN’ on your display then hit the OK button and turn on your wifi network. The wireless network wizard will initiate.
  • Now, your device will start searching the wifi network and display the available networks on your screen. 
  • When you spot the SSID or network name of your wifi network then, use the up and down keys to navigate to it and then click on the OK button.
  • Some options are listed below choose one of them; 
  • In case you wish to use the ‘Authentication and Encryption’ method then enter the network key which it requires. After that tap on the OK button to proceed. To confirm these settings click on the Yes option.
  • If the authentication method is ‘open system’ and you have not chosen the ‘encryption mode’ move ahead with the next step.
  • This way, your Brother printer will try to link to the wifi network.
  • Now, you must download the printer driver software of your Brother printer.
  • For that, go to the Brother printer’s official website and enter your printer’s model name and number.
  • Then, enter the operating system on which you will be downloading the printer drivers.
  • After that click on the download button and then just follow the on-screen guidelines to complete the wifi setup. 

Brother TN630 Ready To Use!

Your Brother TN630 wifi setup will be complete after following the steps listed above carefully. You need to ensure there is a proper power supply with no irregularities and that the wifi network is working just fine and stable to avoid poor network connection breaking the wifi setup process.  You can print wirelessly from any area of the home or small office space after the Brother TN630 wifi setup is complete.

A Beginner’s Guide To Printer Status Unavailable Error

It is so annoying when you try to print a document or a file and your printer prompts a ‘Printer Status Unavailable’ error. Printers carry out so much work these days and any such problem hinders your work pace. The ‘printer status unavailable’ error arises mostly due to the missing or corrupt printer driver software file. Printer drivers play a very important role in the printer’s working and functioning. So, in missing or corrupt printer drivers cases you need to update the drivers from the manufacturer’s official handle. This article helps you with some troubleshooting tips to resolve the error.

Basic Troubleshooting Guidelines To Follow:

  • Look at the printer for any technical defaults. Perform the power cycle function. After that try to print the document and see if it works. 
  • Now, restart your PC device and link your device to the printer. Then, again try to print and check if the connection is possible.
  • Ensure that while printing the documents from the printer you are logged in via an administrative account.

Stepwise Guidelines To Solve The ‘Printer Status Unavailable’ Error:

  • First of all, press the Windows and R buttons on your keyboard.
  • A run box will appear on your screen. Here enter ‘control printers’ in the run dialog box.
  • Now press the enter button.
  • A ‘Devices and printers’ option will reflect on your screen. Click on it. Under this, a list of printers will appear. Right-click on the printer which is showing the unavailable status.
  • Now, choose the ‘remove device’ option to delete the device from your computer or laptop. After that, click on ‘yes’ to confirm your choice.
  • Now, again press the windows and R button together on your keyboard.
  • In the run dialogue box type ‘devmgmt.msc’ and hit the enter button to go further.
  • This will launch the device manager utility on your screen.
  • Here, look for the ‘Print queues’ tab and press the enter button. A drop-down list will display in front of you. From there, tap on the printer you would like to select. To uninstall the printer right-click on it. Then choose the ‘uninstall’ option to confirm the uninstallation.
  • Again, open the run dialogue box by pushing the windows and R key on your keypad. Then enter ‘appwiz.cpl’ in the dialogue box. Shoot the enter button to proceed. 
  • You will observe a ‘program and features’ window reflecting on your screen. 
  • Then continue uninstalling the associated application that is causing the issue on your system. 
  • Now turn off your computer or laptop and detach it from the printer. Wait patiently for some time.
  • The next step is to update the printer drivers from the manufacturer’s official website. For that follow the tips mentioned in the following points. 
  • Firstly, press the ‘Windows + R’ buttons on your keyboard and enter ‘devmgmt.msc’ in the run dialogue box. The device manager will launch soon after. 
  • Now look for the ‘print queues’ menu and expand it. A drop-down menu will prompt on your screen, click on the printer that you are currently working on. To update the printer drivers tap on the ‘update driver’ option by right-clicking on the printer. 
  • “How do you want to find the drivers?“ prompt will display on your screen.  To this, tap on the option “Search automatically for updated driver software“  to search the printer drivers that are compatible with your operating system and printer model.

Printer Status Available!

We hope we are successful in solving your ‘printer status unavailable’ error. The guidelines mentioned above to uninstall and reinstall the printer drivers on your computer or laptop are very clear and crisp. They will help you throughout. In case there is some other error or you are unable to solve the issue then contact our technical team to get the best help.

Design a site like this with WordPress.com
Get started